

Modern networks benefit from continuous telemetry and distributed visibility. Instead of relying solely on centralized monitoring systems, lightweight sensors placed throughout the network can provide real-time insight into connectivity, performance, and stability.
Ideal platforms for this type of monitoring are:
- a Linux gateway / firewall
- a WLAN Pi
- a Docker on a Cisco AP or Switch
Both already sit in strategic positions within a network and can easily be extended with additional observability tooling.
This article explains how these devices can be used as ORB sensors, providing network telemetry directly from the edge.
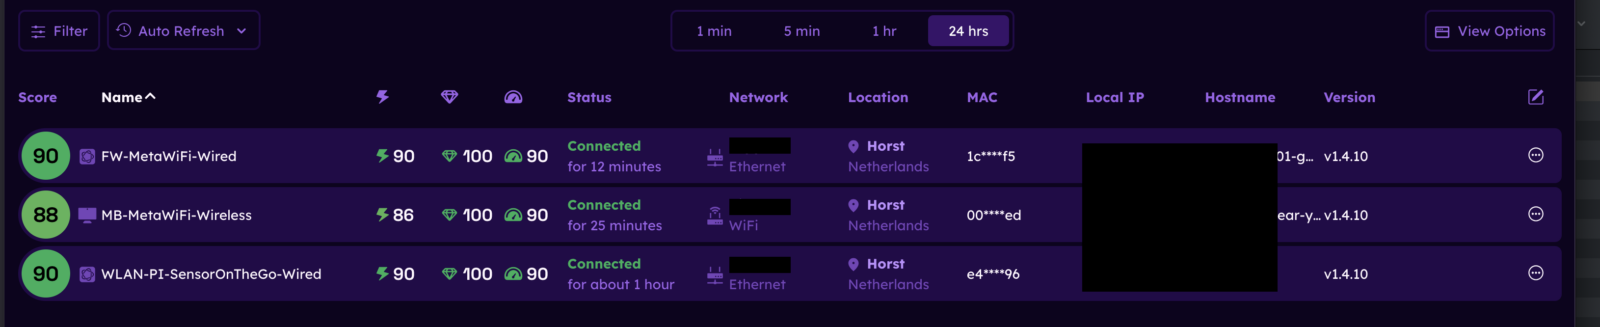
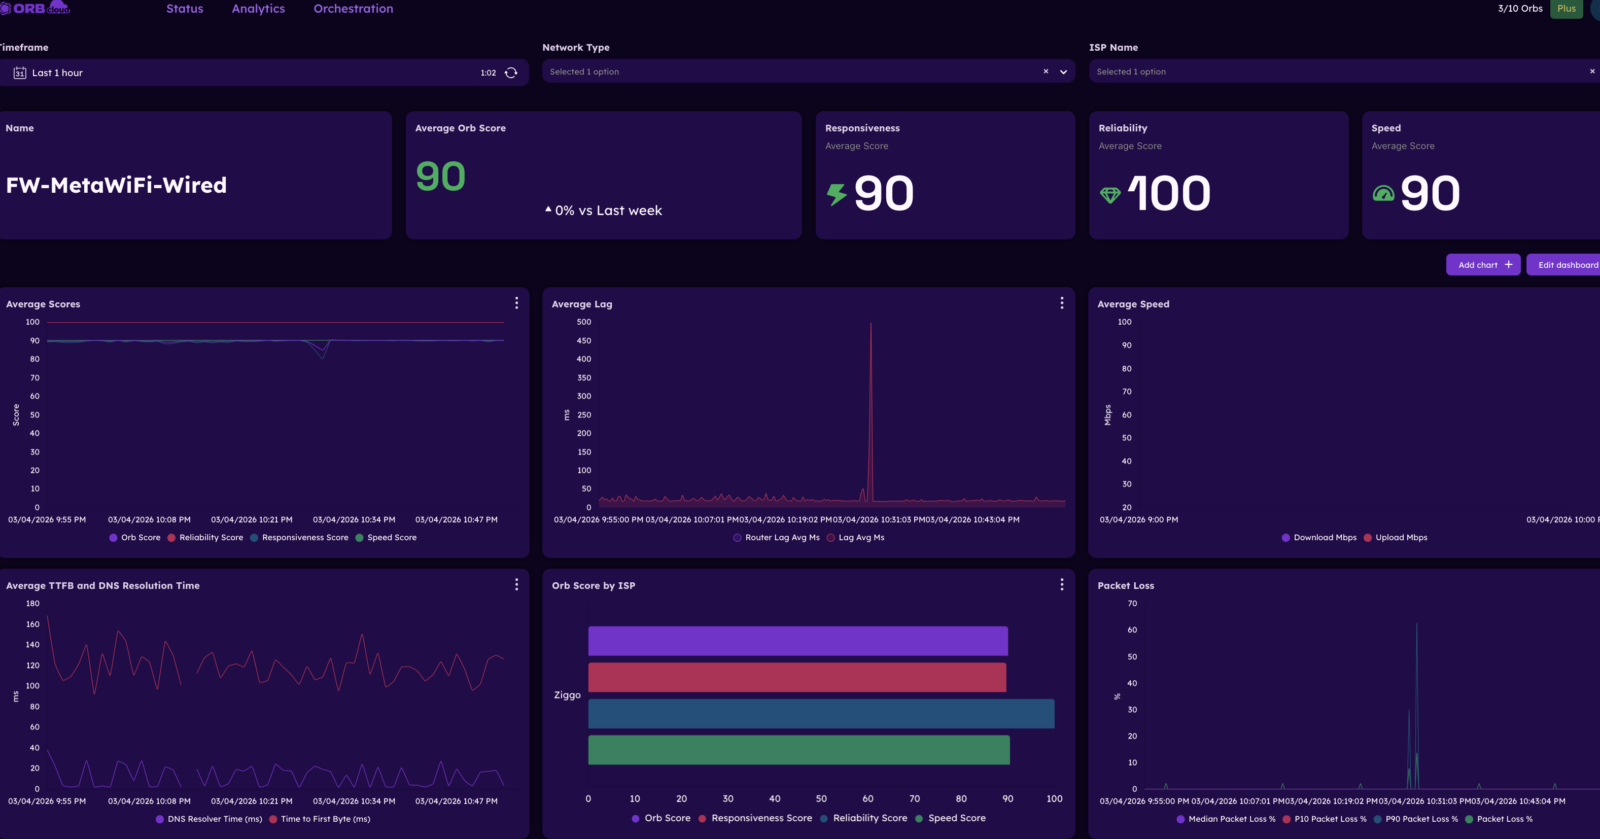
Wireless Client metric from a Orb sensor on a wireless client

Why Use Network Sensors?
Traditional monitoring often relies on polling infrastructure devices (SNMP, syslog, or controller APIs). While useful, this approach does not always capture the actual user experience or detect issues occurring between network segments.
Deploying lightweight sensors provides several advantages:
- Continuous latency and packet-loss measurements
- Visibility into ISP performance
- Detection of network degradation
- Distributed telemetry across multiple locations
- Faster troubleshooting of connectivity issues
By placing sensors at critical points in the network, operators can observe how traffic behaves across different segments.
it can be placed on linux OS but also on dockers. Dockers run now a days on Cisco Hardware and even 9k Cisco Access-Points.
Catalyst Access Points (ARM64)
| Device | Architecture | Notes |
|---|---|---|
| C9105AXI/W | aarch64 | Requires Catalyst Center or ioxclient |
| C9115AX | aarch64 | Requires Catalyst Center or ioxclient |
| C9117AX | aarch64 | Requires Catalyst Center or ioxclient |
| C9120AX | aarch64 | Requires Catalyst Center or ioxclient |
| C9130AX | aarch64 | Requires Catalyst Center or ioxclient |
| C9124AX | aarch64 | Requires Catalyst Center or ioxclient |
| C9136I | aarch64 | Requires Catalyst Center or ioxclient |
| C9162I | aarch64 | Requires Catalyst Center or ioxclient |
| C9164I | aarch64 | Requires Catalyst Center or ioxclient |
| C9166I/D1 | aarch64 | Requires Catalyst Center or ioxclient |
Read about deploying it on Access-Points here
Catalyst Switches (x86_64)
| Device | Architecture | Notes |
|---|---|---|
| Catalyst 9300/9300-X | x86_64 | IOx Local Manager supported |
| Catalyst 9400 | x86_64 | IOx Local Manager supported |
| Catalyst 9500H | x86_64 | IOx Local Manager supported |
| Catalyst 9600 | x86_64 | IOx Local Manager supported |
Linux Gateway/ Firewall as a Sensor
A Linux gateway or firewall is one of the most valuable locations for a sensor. Since it sits between the local network and the internet, it naturally observes most traffic flows.
Adding an ORB sensor to the same system allows the gateway to also report network health metrics such as:
- latency to external endpoints
- packet loss
- connectivity stability
- interface performance
Because the gateway already runs continuously, it is an efficient platform for passive telemetry collection.
Example architecture:
Internet
   │
Linux Gateway (Firewall + ORB Sensor)
   │
Local Network
The gateway sensor helps identify issues such as:
- ISP congestion
- intermittent packet loss
- routing anomalies
- upstream outages
Install probe on Unifi USG-Fabric
Step 1: Enable SSH
In order to install Orb on your UniFi Router, you’ll need enable SSH access. If you already have SSH access enabled, skip ahead to
- Browse to your UniFi Router control interface.
- Go to Settings -> Control Plane -> Console.
- Enable the SSH option and click ‘Confirm’.
- Optional: Generate a new password if you have lost it.
Step 2: Install Orb
You can now login to your UniFi Router over ssh, so we can install the Orb sensor:
- Open your terminal and type
ssh root@[router-ip]. It will ask for the password. - Create Orb install script:
mkdir -p /mnt/data/on_boot.d/ && cat <<'EOF' > /mnt/data/on_boot.d/orb.sh && chmod +x /mnt/data/on_boot.d/orb.sh

#!/bin/bash
3. add the following inside:
# install the Orb keyring
sudo mkdir -p –mode=0755 /usr/share/keyrings
curl -fsSL https://pkgs.orb.net/stable/debian/orbforge.noarmor.gpg | sudo tee /usr/share/keyrings/orbforge-keyring.gpg >/dev/null
# add the Orb repository
curl -fsSL https://pkgs.orb.net/stable/ubuntu/ubuntu.orbforge-keyring.list | sudo tee /etc/apt/sources.list.d/orb.list
# disable mdns discovery, as it collides with protect ports
cat <<‘EOD’ > /etc/default/orb
ORB_ZEROCONF_BROWSE=0
ORB_ZEROCONF_PUBLISH=0
ORB_FIRSTHOP_DISABLED=1
ORB_EPHEMERAL_MODE=1
EOD
# install Orb (no-op if already installed)
sudo apt-get update && sudo apt-get install orb
# enable auto-update
sudo systemctl enable –now orb-update.timer
EOF
4. Run thescrip just created Orb installer:
/mnt/data/on_boot.d/orb.sh
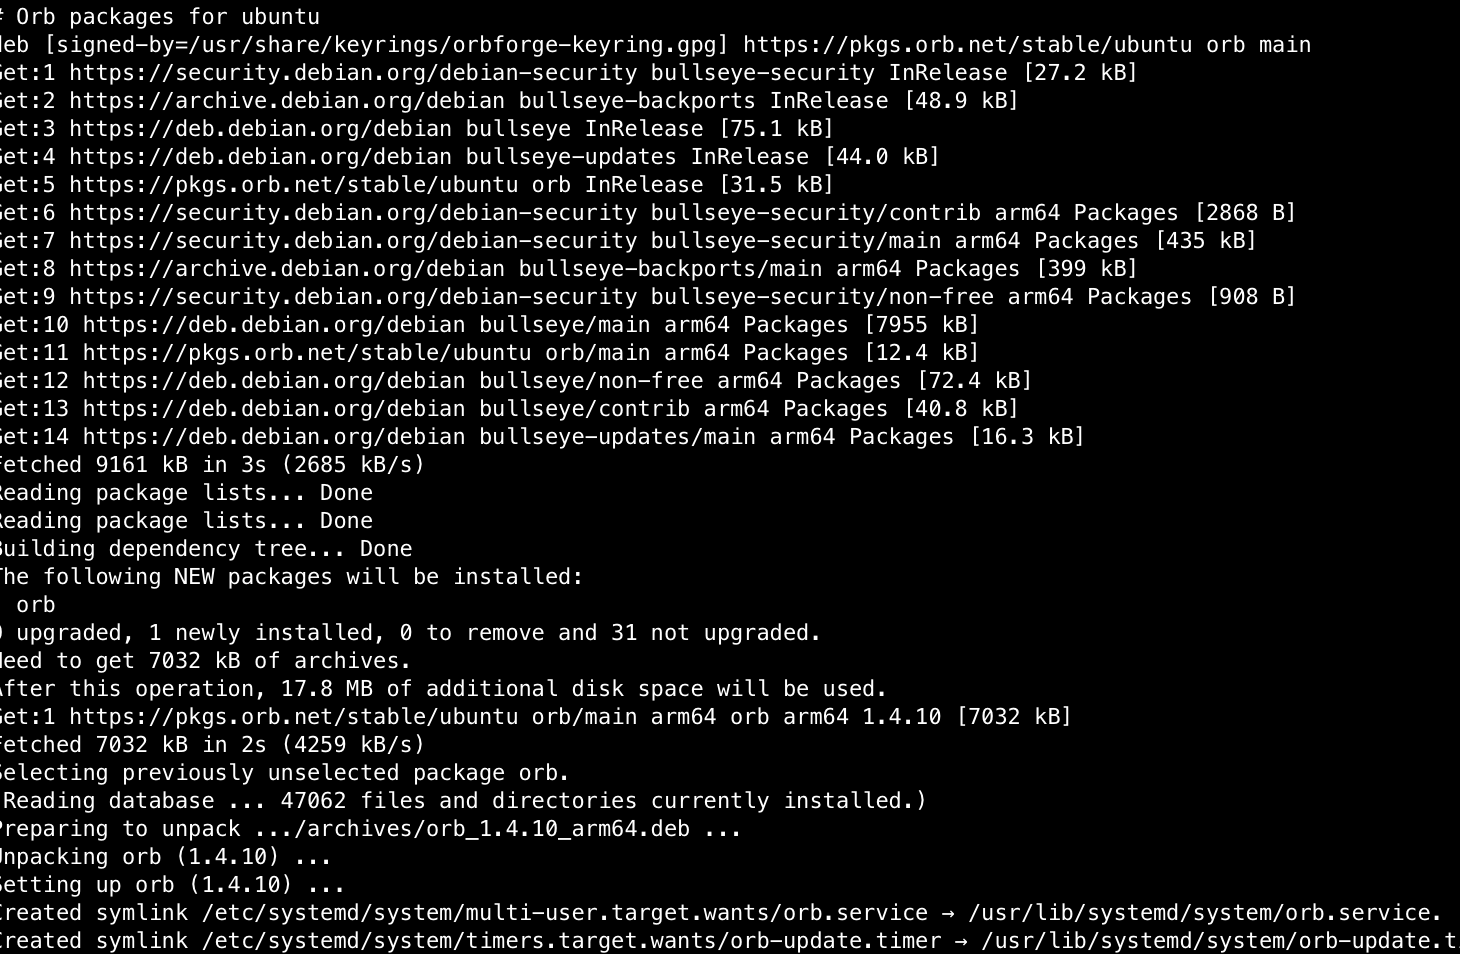
5. Link the orb install to your account. Run this command and copy the link in your browser
sudo -u orb orb linkInstall orb probe on the WLAN Pi
The WLAN Pi has become a popular tool for wireless engineers and network operators. Designed as a compact Linux-based platform for Wi-Fi analysis and troubleshooting, it is also perfectly suited for lightweight monitoring tasks that you can place at a customer site.
Advantages of using a WLAN Pi as a sensor include:
- small form factor
- low power consumption
- portable deployment
A WLAN Pi sensor can be placed in various locations to monitor different parts of the network:
- near wireless access points
- in remote offices
- on a guest network
- at branch locations
This allows operators to measure connectivity from the perspective of actual client environments.
Example placement:
        Internet
           │
      Linux Gateway
           │
    ┌──────┴──────┐
    │             │
 WLAN Pi       LAN Clients
 Sensor
The WLAN Pi can measure:
- Wi-Fi performance
- DNS responsiveness
- internet latency
- connection stability over time
Step 1: Connect to your WLAN Pi device via SSH
- Open a terminal or command prompt on your computer.
- macOS/Linux: Use the Terminal application.
- Windows: Use PowerShell or Command Prompt.
- Connect to your WLAN Pi device using the following command, replacing
<your-wlanpi-ip-address>with the actual IP address:
ssh wlanpi@<your-wlanpi-ip-address> - If prompted about the authenticity of the host, type
yesand press Enter. - Enter the password for your WLAN Pi device when prompted (default is
wlanpi). You should now have a command prompt logged into your WLAN Pi device.
Step 2: Install Orb
- At the WLAN Pi command prompt, run the following command exactly as shown:
curl -fsSL https://pkgs.orb.net/install.sh | sh
This command downloads the Orb setup script and executes it. The script will: Detect the device’s architecture and operating system.- Add the Orb package repository.
- Install the Orb package (
orb) and its dependencies using the system’s package manager (apt). - Start the Orb Sensor service using systemd.
- Enable auto-updates to keep Orb up-to-date.
- Wait for the script to complete. You should see output indicating the progress of the installation.
You might be prompted for your password again during the installation ifsudois required.
Step 3: Open Firewall Port
- WLAN Pi uses
ufw(Uncomplicated Firewall). To allow the Orb app to communicate with the sensor, you need to open port 7443. Run the following command:
sudo ufw allow 7443/tcp - Enter your password if prompted. This command configures the firewall to allow incoming TCP traffic on port 7443, which Orb uses.
Step 4: Link your new Orb Sensor
- Once the installation and firewall configuration are done, the Orb Sensor should be running on your WLAN Pi device.
- Open the Orb app on your phone or personal computer.
- Your new Orb Sensor should be automatically detected on your network and appear in the app, ready to be linked to your account. Follow the prompts in the app to link it.
Benefits of Combining Both
Using both platforms together creates a simple but powerful observability setup.
| Sensor Location | | Insight Provided |
|---|---|
| – Linux gateway | – ISP and upstream health |
| – WLAN Pi | – wireless and client-side experience |
With multiple sensors deployed, operators gain a clearer picture of where issues originate.
For example:
- If the gateway reports high latency but the WLAN Pi does not, the issue may be internal.
- If both report packet loss, the problem may be upstream.
- If only the WLAN Pi detects instability, the issue may be related to Wi-Fi coverage or interference.
Practical Use Cases
Common scenarios where this approach proves useful include:
- Home labs and small networks
Operators can monitor ISP quality and detect intermittent outages. - Branch office monitoring
Distributed sensors provide visibility across multiple sites. - Wireless troubleshooting
A WLAN Pi sensor can continuously measure Wi-Fi and internet performance. - Network baselining
Long-term telemetry establishes a performance baseline, making anomalies easier to detect.
Conclusion
Turning existing infrastructure into network sensors is a simple and effective way to improve observability. A Linux gateway provides insight at the network edge, while a WLAN Pi offers visibility closer to end users and wireless environments.
Together they create a lightweight distributed monitoring system that helps operators quickly identify and diagnose connectivity issues.
As networks grow more complex, these types of edge-based telemetry nodes become an increasingly valuable part of modern network operations.
If you like the product get it for free click on the banner below to get started


Andy Stevens, CWNE #486 en oprichter van MetaWiFi. Ontwerpt, meet en valideert Wi-Fi netwerken voor bedrijfskritische omgevingen en schrijft daarover op TalkAboutWiFi. Meer over MetaWiFi